

Contracts
GLPI supports contracts management, in order to manage contract types such as loan, maintenance, support...
Contracts management allows to:
make an inventory of all contracts related to the organization assets
integrate contracts in GLPI financial management
anticipate and follow contract renewal.
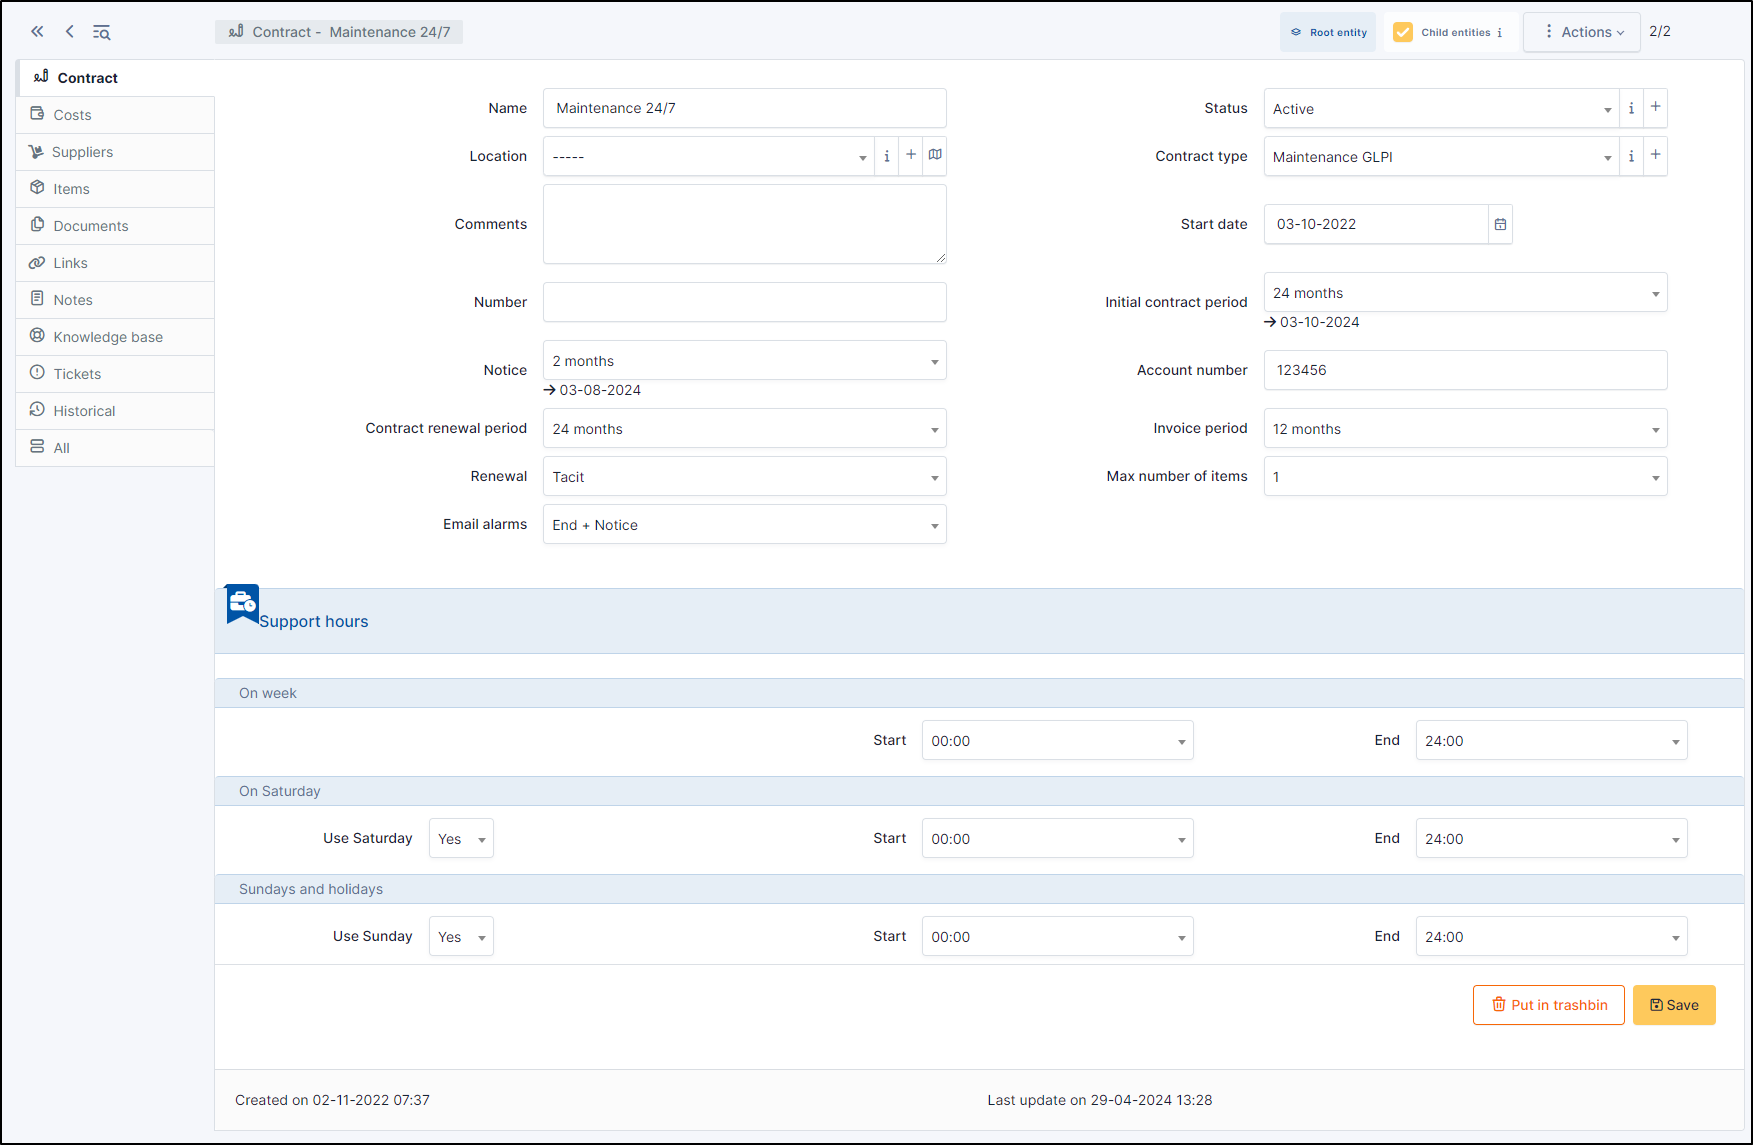
To add a new contract, click on + Add at the top of the screen
Description of specific fields
Contract type: by default, no contract type is defined, contract types must be configured in drop-down configuration;
Number: contract number;
Start date: date at which contract starts, all periodicity based events are computed using this date;
Initial contract period: if this field and start date are given, contract end date will appear, colored in red if contract has expired;
Notice: used to trigger alert notifications;
Account number: used to connect with company accounting software;
Contract renewal period: duration after which contract renewal is available;
Invoice period: duration between invoices;
Renewal: Tacit (the contract is automatically renewed if no party has ended it) or Express (needs agreement for renewal);
Max number of items: attaching new items to this contract will be blocked when overflowing this number;
Support hours: support hours as defined in the contract, it is possible to distinguish week days, Saturdays and Sundays/holidays.
Costs
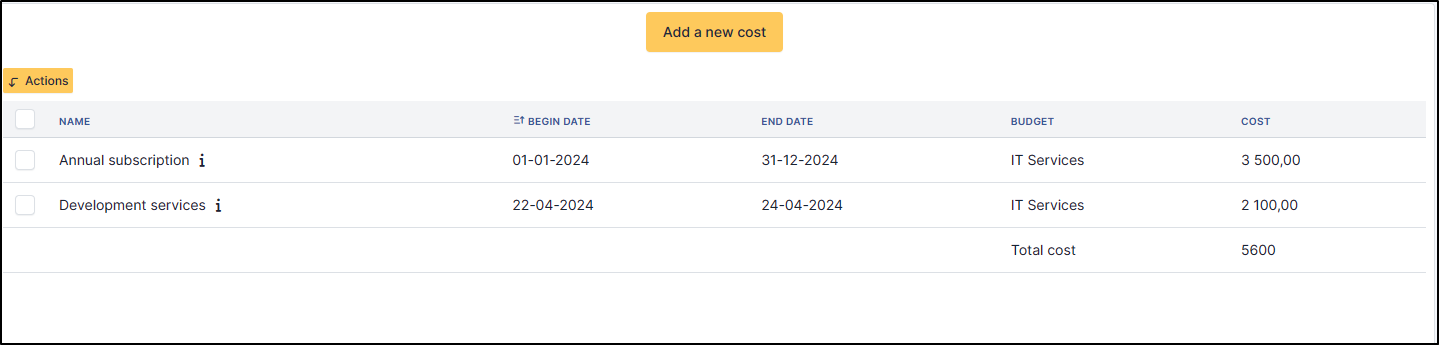
This tab allows to define a cost related to the contract and linked to a GLPI budget: the cost of the contract will be imputed to this budget.

To add cost, click on Add a new cost
Enter a name
The start and end dates of the costs covered by the contract
If a budget has already been created, select it from the list, otherwise go to budget
Enter the real cost
All the costs you add will be visible and added together in this same tab.
Suppliers
This tab allows to associate one or several suppliers to the contract.
Items
The Items tab is used to show or add linked assets.
Documents
The document tab lets you link different types of file to a material (PDF, txt, png, etc.) You can attach a document already uploaded to GLPI or add a new one directly from this tab.
Links
Links offer several possibilities. Send the GLPI object file to another URL of your choice, or generate an RDP file, for example.
Notes
Note lets you add enriched text and attach a document.
History
The History tab is used to show any changes made to an item. The following information about the changes is available:
ID of the change.
Date and time the change was made.
User who made the change. If this field is not filled, it means that the action was done automatically (For example: automatic inventory update).
Field that was changed.
Description of the change that was made.
The description of the change represents either the difference between the old and the new value (For example with location field: Change HQ to Remote Office A), or the explanation of the action which was carried out (For example: Uninstallation of a software: "Gimp 2.0").
All Information
For an item, all information is displayed on one page from the All tab. This shows all of the tabs of an object's form in one view, one below the other.
Last updated